i finally made a trip to my local yarn shop. it was sooooooo much fun! my sister and i were going to all the stores that sell yarn cause she wanted a tam and scarf set for her birthday, but she wanted particular colors. so i told her it would just be easier if we went together to A.C. Moore, Joann Fabrics, and this local shop which i had never been to before. We went to the yarn shop first and boy and i glad we did! the lady who owned the shop was there with her two friends and they were sitting at a table knitting and crocheting. they were all so friendly! this happened in early October, so i can't remember all the details, but basically, we ended up hanging out there for almost two HOURS!! just talking with the ladies and looking at all the wonderful yarns. it was such a nice experience. i ended up getting $70 worth of yarn!!! my sister decided she wanted a mitten and scarf set in one color and a tam and scarf set in another color. and then i saw this absolutely dream-a-licious grey wool yarn and i just had to buy 2 skeins of that at 18 bucks a pop. so worth it.
i didn't tell them i use a loom to knit. the conversation was just going so nicely and it would have broken my heart to encounter any knitting snobbery. the owner didn't seem like that kind of person, but...
after the fact, i kinda felt guilty, almost as if i was acting as if i was ashamed of loom knitting. but it wasn't about that at all. i've just had to deal with so much knitting snobbery with my friends that i didn't want to chance getting it from this woman with this lovely yarn store and then i would never go there again and get my hands on her yummy yarn anymore. she told us to stop by anytime and sit and knit with her. she also told me to come back when i finished my sister's stuff. so maybe when i go back i'll show her the fine quality of my items, LOL, and then tell her they were done on looms. i feel as if i have to go back there and tell them i use looms to make up for not saying anything before. i am not ashamed of my looms, dammit! LOL
then we decided to still go to A.C. Moore and Joann Fabrics cause i had found coupons to both places. just to take a look to see if they had anything better. nothing at A.C. Moore. but at Joann's i found the purple hat loom! so exciting! i made a hat with my yummy gray yarn with that in one day! looks and fits great. i'm also gonna use that to make my sisters tam and i've been "commissioned" by a friends mother to make a tam for her as well. non paying job, but i'm happy to spread the knitting love!
November 27, 2009
August 29, 2009
Beaded Headband
there's been a lot of talk on one of the looming groups i belong to (The Knifty Knitter and Loom Knitting Group, you should join!!!!) about beaded work. a lady had done a cute set of hats with beads in the brim. it generated a lot of posts and it got me thinking about beading. so, when i went to knit a headband, i decided to throw some beads on it. it wasn't very hard, but it was a bit tedious. i was working with a ribbon yarn which was very sheer. i had some cute, tiny, little red beads that i wanted to use, but i couldn't find my needle threader. but i have tons of different gauge wire from my jewelry making, so i figured i would make a threader out of that. but all the wire was too thick. in some cases, the bead would go on the wire, but you need to double the wire up to have a little loop to thread the yarn through, and when i made the little eye, the bead wouldn't fit over the wire anymore. so i was stumped, trying to think of another way or a thinner wire to use when it came to me...GARBAGE BAG TIES!!! that wire was thin and flexible enough! so that's what i did! AND, i figured out that i don't have to make a complete eye to thread the yarn through, i just need to fold the wire over. here's a little slideshow i made to show what i did. hopefully its clear enough to help someone else out.
the hardest part was constantly pushing the beads down the length of yarn as i knitted. i had threaded on about 70 to 80 beads. its a lot to push down. i had to push down ten or fifteen, then go back and push down another ten or fifteen. it took a little time each time i had to push the beads down. i THOUGHT i had pushed it down really far, but, two or three rows later, i had to push them down again. the yarn was curling up on itself, too, and i couldn't get it to straighten out because of the beads. but, all in all, i was happy with the result. i decided to get a little fancy and try to make a pattern on the headband, but i quickly settle on just a basic wave pattern. anything else would require me to get out the graph paper and sketch it out. here's a few pic of the finished headband.
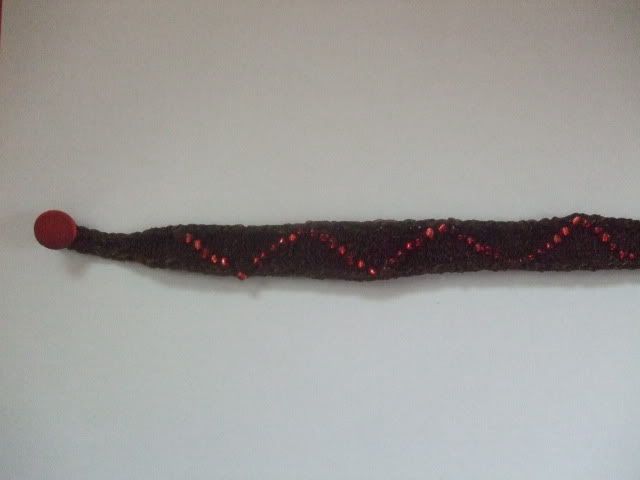
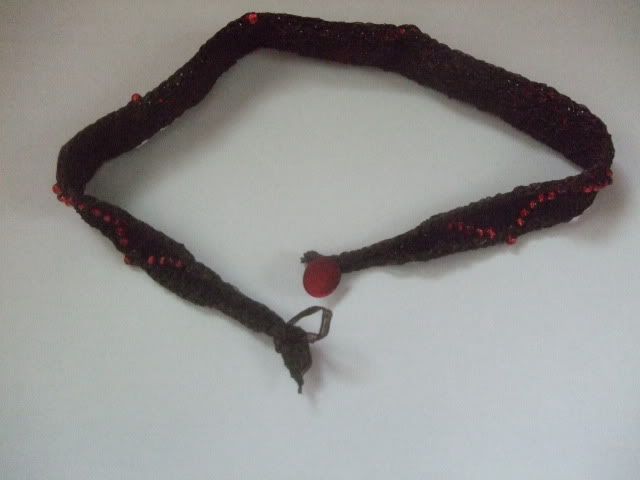
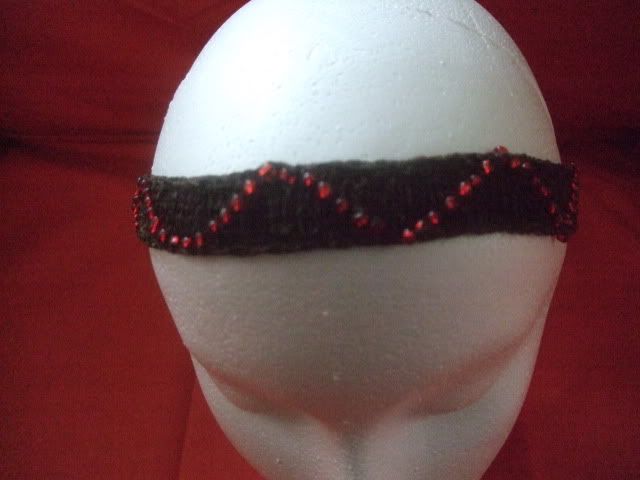
the hardest part was constantly pushing the beads down the length of yarn as i knitted. i had threaded on about 70 to 80 beads. its a lot to push down. i had to push down ten or fifteen, then go back and push down another ten or fifteen. it took a little time each time i had to push the beads down. i THOUGHT i had pushed it down really far, but, two or three rows later, i had to push them down again. the yarn was curling up on itself, too, and i couldn't get it to straighten out because of the beads. but, all in all, i was happy with the result. i decided to get a little fancy and try to make a pattern on the headband, but i quickly settle on just a basic wave pattern. anything else would require me to get out the graph paper and sketch it out. here's a few pic of the finished headband.


July 20, 2009
i got a job! yay!!! but i'm taking an 8 THOUSAND DOLLAR a year pay cut. the economy is so bad no one is offering any decent salaries! five and a half years ago, with virtually no college coursework and five years less experience, i was hired on at my old job at $14.65 an hour. over the five years i gradually made it up to $15.94. then the economy collapses and my center got closed down and now i'm laid off. everywhere i was looking for a job in the past few months ranges from 12 to 14 an hour!!!! with most of them averaging around $13!! and that all well and good, but i'm now a ten year veteran with much more education under my belt! you'd think i could at least start off at $15! but NO, no place wanted to even consider it. so i finally ended up with this particular company, which was offering the lowest salary ($12 an hour), but it was the place i really really loved the most and had the most room for growth. i'm actually so so exited to go work for this place.so, now this means i really gotta get up on my game in regards to knitting things to sell. I'm not going to recoup my 8K a year, but if i could even get 2 or 3K, that would be awesome. so i made these three products. i haven't put them up to sell yet cause i want to get really nice pics of everything. i'm probably only gonna ask for like 5 bucks each for these first few things cause i can definitely see areas for improvement. for someone like me, who's an easy going relaxed consumer, minor errors won't bother me. but for someone like my sister, who is very picky and particular, the small errors might make her angry. its not like there are a lot of errors on each piece. it just that each piece has one small stitch error each. one tiny error. a knt where its suppose to be a purl. or the stitches aren't picked up evenly. it makes me angry, but i do it every time!! arg! so i can't ask for any sort of decent price for these things. i'm basically just trying to make enough back to buy some more yarn.
the first one is a raspberry tam.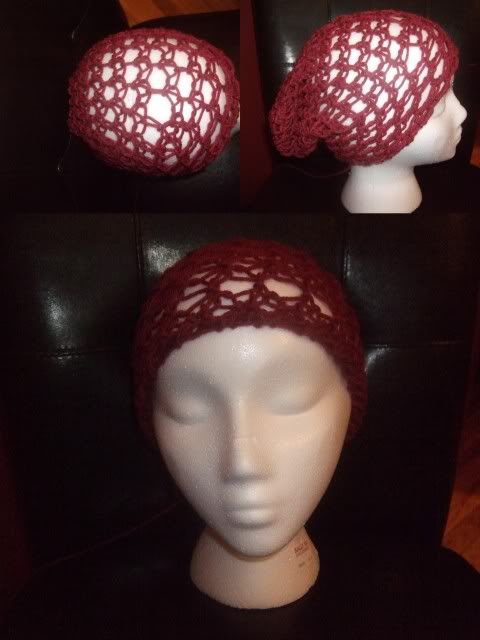
there's a little string hanging out from the back. that's the drawstring from the drawstring cast on. its cool casue you can make the tam opening large to get it over your hair and then tighten the tam so it stays on your head. but then what do uou do with the hanging string? its not like you can tie it or something. i suppose one could tuck it under. but i don't know how to advertise and make that lone tightening string a good thing. so that's the error with that piece.
the next one is a larger tam in strawberry lemonade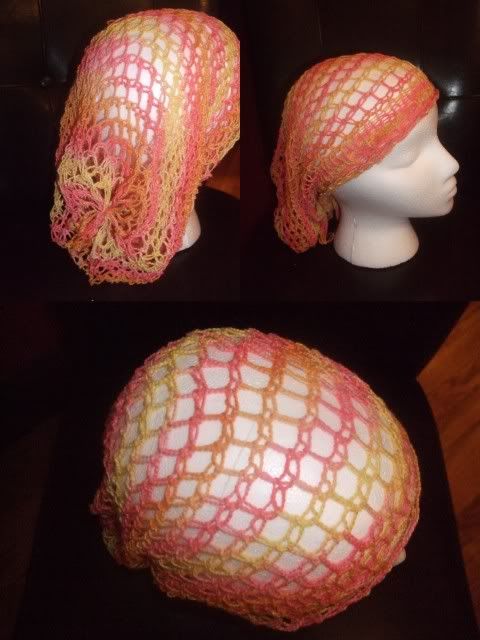
this one is one of my favorites. for this one, i did an i-cord for a drawstring and wove it through the headband and it ties in the back. it actually looks really nice. but the error on this one is on one side of the drawstring, the yarn is loose!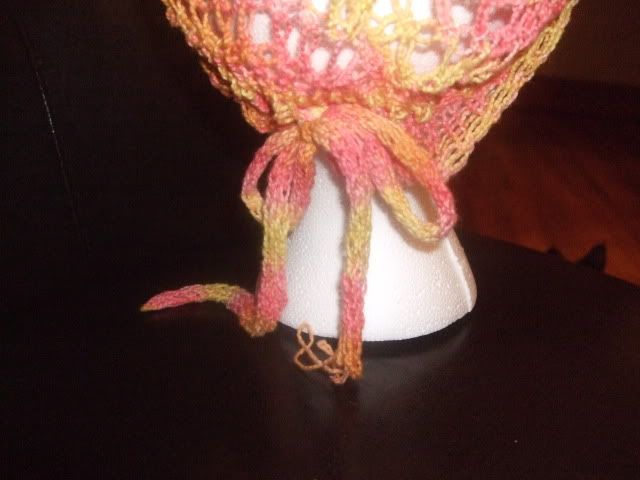
you can see it on the end of the drawstring on the right side. i don't know how this happened! it won't come unraveled, but it doesn't look as neat as it could have! arg!!!
the last one is a knitted visor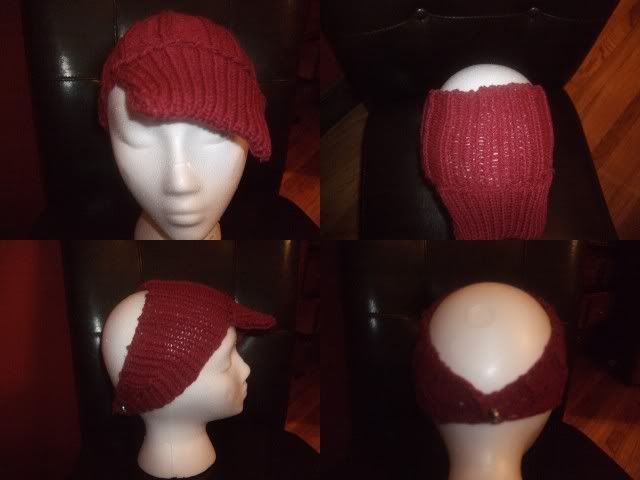
i love, love, love, this one. this one has some stitch errors where the visor meets the head piece. i grabbed the wrong stitches on two or three pegs when i was folding over the top of the visor. needless to say, i almost wept in frustration. and, the visor is a little too narrow for my taste. i would prefer if it was a little bit wider. i'll probably make the next one with a wider visor. and this one is adjustable!! the back closes with a decorative button, but there are five button slots in the back, so it could fit a child's head as well. but i like it a lot. maybe i'll be bold and ask for 6 dollars for this one! LOL!!
that's about it. i start my new job next week so i may not have as much time to knit after that. right now i it takes me about one day to make each piece. although i don't actually knit every day. but when i srart work, it might take two or three days to complete each piece. i'll throw these these three pieces on my Etsy page and see what happens. Maybe no one will want them and i'll end up giving them away as gifts for my family. we'll see...
the first one is a raspberry tam.

there's a little string hanging out from the back. that's the drawstring from the drawstring cast on. its cool casue you can make the tam opening large to get it over your hair and then tighten the tam so it stays on your head. but then what do uou do with the hanging string? its not like you can tie it or something. i suppose one could tuck it under. but i don't know how to advertise and make that lone tightening string a good thing. so that's the error with that piece.
the next one is a larger tam in strawberry lemonade

this one is one of my favorites. for this one, i did an i-cord for a drawstring and wove it through the headband and it ties in the back. it actually looks really nice. but the error on this one is on one side of the drawstring, the yarn is loose!

you can see it on the end of the drawstring on the right side. i don't know how this happened! it won't come unraveled, but it doesn't look as neat as it could have! arg!!!
the last one is a knitted visor

i love, love, love, this one. this one has some stitch errors where the visor meets the head piece. i grabbed the wrong stitches on two or three pegs when i was folding over the top of the visor. needless to say, i almost wept in frustration. and, the visor is a little too narrow for my taste. i would prefer if it was a little bit wider. i'll probably make the next one with a wider visor. and this one is adjustable!! the back closes with a decorative button, but there are five button slots in the back, so it could fit a child's head as well. but i like it a lot. maybe i'll be bold and ask for 6 dollars for this one! LOL!!
that's about it. i start my new job next week so i may not have as much time to knit after that. right now i it takes me about one day to make each piece. although i don't actually knit every day. but when i srart work, it might take two or three days to complete each piece. i'll throw these these three pieces on my Etsy page and see what happens. Maybe no one will want them and i'll end up giving them away as gifts for my family. we'll see...
June 26, 2009
Tote Bag by Graciela Worth
so this week in the loom knitters classroom, we had a tote pattern by Ms. Graciela Worth. now, i must admit, i've been a part of the classroom for just about a year and i only actually finished one project, the ribby gloves by Laura Campion. i see all these wonderful projects come through but i just never have the time to do them, or, if i start, i never finish them. yep, miss UFO is my name!
but this week the project seemed really cute and i had really been wanting to try a purse of some sort. lucky for me, my boyfriend gave me an A.C. Moore gift card as one of my birthday presents and so i hopped on over there earlier this week and bought a purse handle along with some new crochet hooks and buttons. but,of course A.C. Moore didn't have the exact handle i wanted (in fact, they only had TWO styles in the WHOLE store! what?!), so i drove five minutes over to Joanne's, and of course they had exactly what i wanted and then some! its never the first store you go to, right?! so i ended up spending money anyways and buying 2 other purse handle sets and a few of those solid rings you can use to connect the purse with that handle. i figured i could knit a handle to match a purse as well this way.
i started knitting the tote on Tuesday, i think, and i finished it up today (Friday)! it was suppose to be 40 rows of a garter stitch using the e-wrap, but i really don't like the look of garter, so i did about 50 rows of my modified rib stitch, which is turning out to be my favorite.
my yellow loom is already marked off with rubber bands. its two knits and one purl. but then i like to turn the product inside out. i know it seems weird. you might ask why i just don't do two purls and one knit in the first place, but it just doesn't look the same! i've tried! and i'll admit i have a thing with turning things inside out.
of course there are a PLETHORA of mistakes! LOL! as usual i was watching TV whist knitting and i messed up on the pattern. i seem to automatically default to purl stitches when i'm distracted! LOL! so on two different rows, you can see where i continued purling when i should have been knitting. i decreased way too much on the part where the yarn wraps around the handle. its suppose to be much wider, but i totally messed up. oh well. and the biggest mistake? i put the flipping handles on backwards!!!! you know how one side is flat and one side is rounded and the flat sides are suppose to be facing each other on the inside of the purse? well, i managed to sew BOTH handles in the wrong way! i was almost tempted to turn the bag bag right-side out to make the handles right, but in the end, i went with my quirky little error. and because the handles are shaped like ovals,i can have them either horizontal or vertical. i'm thinking about anchoring the handles by wrapping them in yarn later so they stay one way, but that's way off. i was also thinking about lining the bag, but i can't find a material i like enough yet.
the pics aren't the greatest quality, the color looks washed out in a lot of them. once again, i had to use my camera phone cause i can't find the battery charger for my digital camera! arg!!! i took a pic of the bag against my granite table cause i thought the natural colors of the bag against the stone looked so cool together.
so, without further ado, here are the pics of my cute little bag!
June 20, 2009
Cocktail hat
so as i was fooling around with different yarns and stitches to use with the Calorimetry pattern, i messed up on the bind off and instead got this.
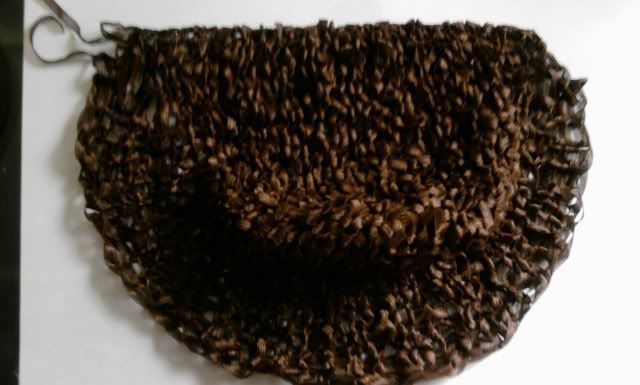
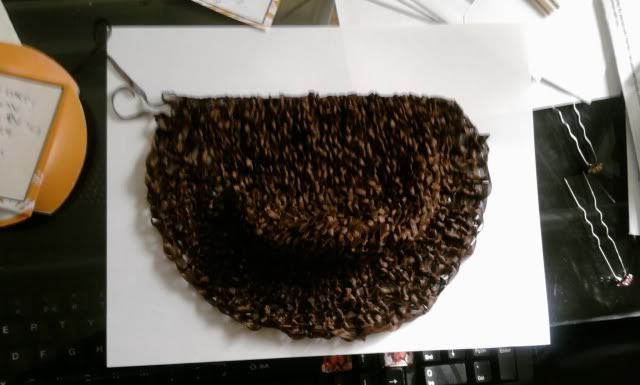
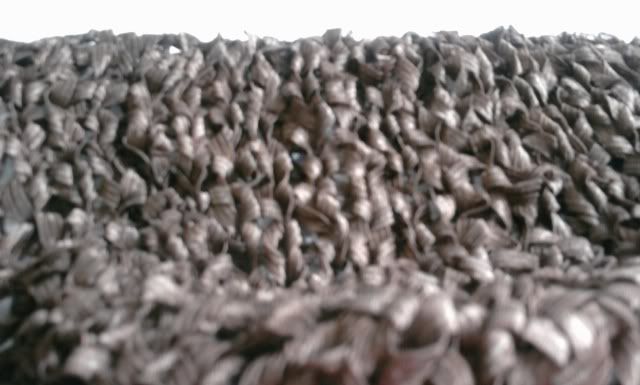
and here's a closeup of the ribbon yarn and the stitch
love it!!! it looks almost like a 1930's cocktail hat, and so that's what i made it! i showed it to my sister on thursday and she snatched it up before i even got pics! but we had a wedding to go to today (saturday) and it matched the colors of the dress i was planning to wear, so she graciously "allowed" me to have it back for the day. i had to get as many pics of it on me as i could, so i just put them all in a slide show for your viewing pleasure! LOL! i might have to make a few more of these in different colors!


and here's a closeup of the ribbon yarn and the stitch

love it!!! it looks almost like a 1930's cocktail hat, and so that's what i made it! i showed it to my sister on thursday and she snatched it up before i even got pics! but we had a wedding to go to today (saturday) and it matched the colors of the dress i was planning to wear, so she graciously "allowed" me to have it back for the day. i had to get as many pics of it on me as i could, so i just put them all in a slide show for your viewing pleasure! LOL! i might have to make a few more of these in different colors!
June 15, 2009
Kneel Down, Puke Up
kneel down, puke up. kneel down, puke up...
that's my little chant i use to remember what direction to make the loop when i'm using and pattern that requires knits and purls in the same row, like a rib stitch type thing. when you do a knit stitch, you pull the loop down the peg, therefore, KNEEL down. and when you do a purl stitch, you pull the loop up the peg, therefore PUKE up! it works so great for me! i rarely mess up on my knits and purls anymore! but, i must admit, i was getting some strange look from my boyfriend when he heard me chanting under my breath when i was working on the Calorimetry pattern!
that's my little chant i use to remember what direction to make the loop when i'm using and pattern that requires knits and purls in the same row, like a rib stitch type thing. when you do a knit stitch, you pull the loop down the peg, therefore, KNEEL down. and when you do a purl stitch, you pull the loop up the peg, therefore PUKE up! it works so great for me! i rarely mess up on my knits and purls anymore! but, i must admit, i was getting some strange look from my boyfriend when he heard me chanting under my breath when i was working on the Calorimetry pattern!
June 11, 2009
Oh Ball Winder, How I love Thee!!
i never blogged about it, but i got a ball winder a few months ago. love love love it!! i got it at Joann's.com with a 50%off coupon, so i only ended up paying 30 bucks for it. i also got some looms clips (which i've been DYING for!) and the knifty knitter flower loom. i have a twelve peg ITA flexiloom, but i wanted a knifty knitter one too, just in case! LOL! in anticipation of losing my job, i bought about $150 worth of yarn from Smiley's. its a great online discount yarn store and i encourage you all to check it out! you wouldn't believe how much yarn i got for the money! a lot of it was in hanks and since i had the ball winder, i got to work winding them all. this ball winder makes outside pull balls as well as center pull balls, which i'm not a big fan of because as you pull more yarn from the center, the ball starts to loose structure and if you don't use the whole ball, then you have this wobbly, half formed ball on your hands. so i usually don't make the center pull kind. but then i realized, if i need to use two strand of yarn at one time, i can pull the yarn from the center and the outside of a ball! i know you're suppose to be able to do this with some skeins, but i've never figured it out an it never works for me. all i end up with is a tangled mess when i try it one those skeins. this way works GREAT for me! so now i find myself winding even my skeins of yarn so i have two points to pull the yarn from. and the yarn is much easier to store now that all the balls are the same height and shape and mostly the same width. when i was messing around with that giant skein of yarn when i was doing the Calorimetry pattern, i just wound a bunch of it into a ball first and then used two strands as one. eventually i'll still run into the wobbly ball problem, but it doesn't happen as fast. i keep the ball winder clipped on one of my TV dinner trays and i use my boyfriend's office chair as a make-shift swift when i need it. i just put the hank of yarn over the chair back and i spin the chair to release more yarn as i wind it. works awesome! i must say, i do love my ball winder dearly!
Calorimetry Headscarf
i actually saw the pattern for this headscarf a year ago. I thought it was gorgeous but i just couldn't figure out how it was done. at the time, i hadn't done short rows before and i had no clue how to transfer a pattern from needles to loom. flash forward a year, and one of the ladies on the DALooms list on Yahoo brings it up again. when i went back to look at it again, with a more experienced looming eye, i thought, "ah ha! now i get it!" so i went to work yesterday and made one!
first off, let me say, i wasn't certain it would come out right, so i didn't want to use any of my favorite yarns. recently my friend gave me like 6 or 8 of those Caron One Pound skeins of yarn. that's a lot of yarn! and two of them were in this purply reddish color that i didn't particularly care for. so i wound up a bit on my ball winder (i'll write a little more in another post why i like to do this) and went to work.
now, ya'll know me. i NEVER do a swatch test. never. so, that being said, i wasn't sure if i should use my green or yellow knifty knitter loom. the scarf looks like it calls for a smaller gauge loom, but this was just a test pattern and i wanted it to knit up quick. but then i realized my green loom is still occupied with the baby blanket for my friend (who had her baby a few weeks ago! oh well. at least she got the mittens, bib, and mitts in time!) so i went with the yellow loom, but that would make the scarf too big, so i decided to omit a few pegs. i ended up using 30 pegs of the yellow loom. the pattern calls for a knit 2 purl 2 ribbing, so i marked off the knit pegs with small elastics. then i wrapped a piece of scrap yarn around the middle ten pegs that i wasn't gonna work for the short rows and went to work.
it took me over five hours, but that's only because i was watching TV more than i was knitting. and then i stopped for an hour or so to make dinner for me and my boyfriend. i think if i worked straight through, i could probably finish it in under two hours. i'm not a fast knitter, i'm sure a more experience person could do it in about an hour.
of course, because i didn't swatch, it was too small!!!!!! OHHHHHHHHHHHHHH!!
but it actually came out pretty good! the seam where the short rows are is a little funky. i'm not quite sure why. i'll probably just knit a strap or something to connect the back and add a button. i'm actually starting to like the one i made and i would consider wearing it, but it clashes horribly with my hair. but after making this one, i have ideas of how to make other ones with different stitches and yarns so i can wear them now in the summer. i think for the next one i'm gonna go with e-wraps and purls so the knitting is a little looser and airier and maybe i'll try and all e-wrap one or one with eyelets! maybe next time i'll use one strand of yarn instead of two! the ideas are endless. i'm probably gonna do another one tomorrow. we'll see how that one turns out!
here are the pics! this is the front of it. i didn't weave in the ends yet. there actually isn't that much weaving to do, which is a definate plus for me!!!
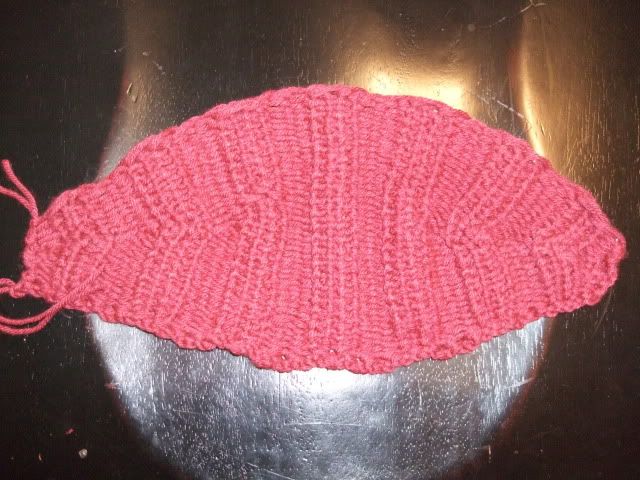
here's the back. looks pretty much the same as the front.
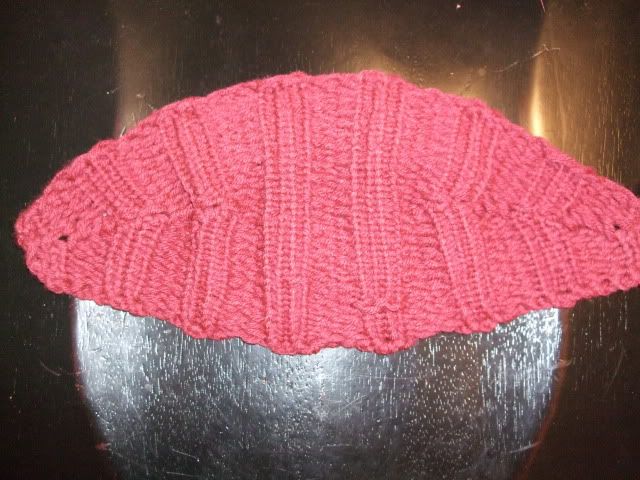
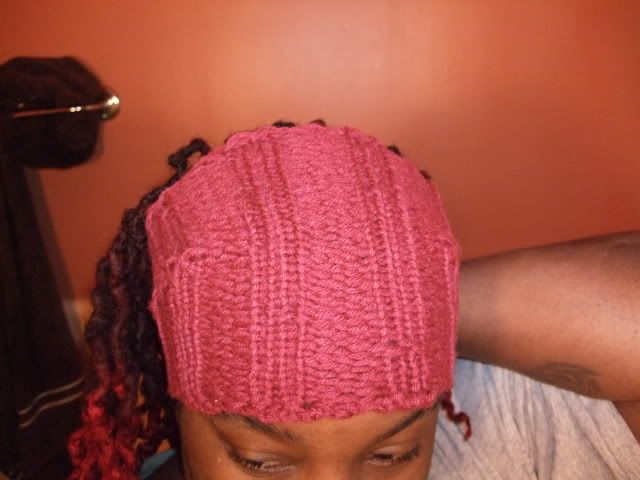
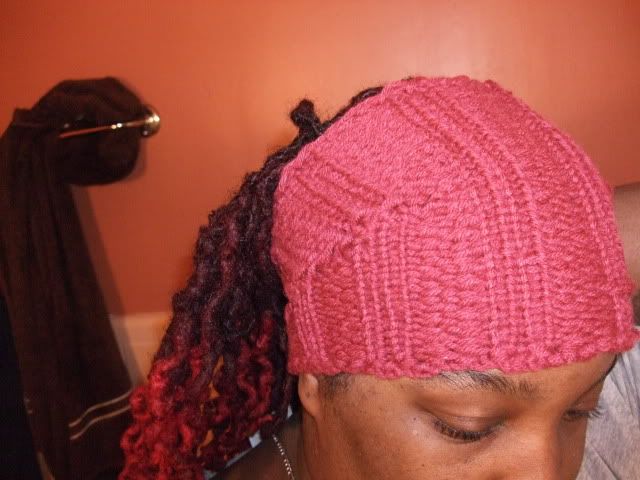
and here it is on my head. i had to hold the two back ends together with my hands, but you get the idea of how its suppose to look.
first off, let me say, i wasn't certain it would come out right, so i didn't want to use any of my favorite yarns. recently my friend gave me like 6 or 8 of those Caron One Pound skeins of yarn. that's a lot of yarn! and two of them were in this purply reddish color that i didn't particularly care for. so i wound up a bit on my ball winder (i'll write a little more in another post why i like to do this) and went to work.
now, ya'll know me. i NEVER do a swatch test. never. so, that being said, i wasn't sure if i should use my green or yellow knifty knitter loom. the scarf looks like it calls for a smaller gauge loom, but this was just a test pattern and i wanted it to knit up quick. but then i realized my green loom is still occupied with the baby blanket for my friend (who had her baby a few weeks ago! oh well. at least she got the mittens, bib, and mitts in time!) so i went with the yellow loom, but that would make the scarf too big, so i decided to omit a few pegs. i ended up using 30 pegs of the yellow loom. the pattern calls for a knit 2 purl 2 ribbing, so i marked off the knit pegs with small elastics. then i wrapped a piece of scrap yarn around the middle ten pegs that i wasn't gonna work for the short rows and went to work.
it took me over five hours, but that's only because i was watching TV more than i was knitting. and then i stopped for an hour or so to make dinner for me and my boyfriend. i think if i worked straight through, i could probably finish it in under two hours. i'm not a fast knitter, i'm sure a more experience person could do it in about an hour.
of course, because i didn't swatch, it was too small!!!!!! OHHHHHHHHHHHHHH!!
but it actually came out pretty good! the seam where the short rows are is a little funky. i'm not quite sure why. i'll probably just knit a strap or something to connect the back and add a button. i'm actually starting to like the one i made and i would consider wearing it, but it clashes horribly with my hair. but after making this one, i have ideas of how to make other ones with different stitches and yarns so i can wear them now in the summer. i think for the next one i'm gonna go with e-wraps and purls so the knitting is a little looser and airier and maybe i'll try and all e-wrap one or one with eyelets! maybe next time i'll use one strand of yarn instead of two! the ideas are endless. i'm probably gonna do another one tomorrow. we'll see how that one turns out!
here are the pics! this is the front of it. i didn't weave in the ends yet. there actually isn't that much weaving to do, which is a definate plus for me!!!

here's the back. looks pretty much the same as the front.

and here it is on my head. i had to hold the two back ends together with my hands, but you get the idea of how its suppose to look.


Sore Fingers
looming hurts! when i'm sitting on the couch for hours and hours on end, my butt and back get really sore. I usually lay the loom against my belly or sit it on my thigh and as i turn the loom around as i knit on it, it rubs against me and it makes my belly or thigh sore.
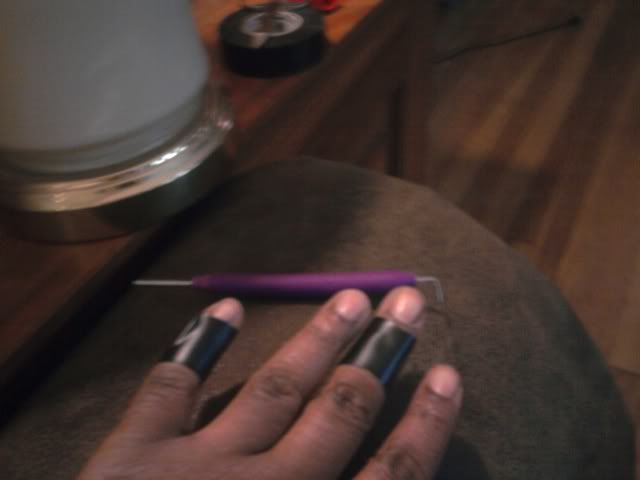
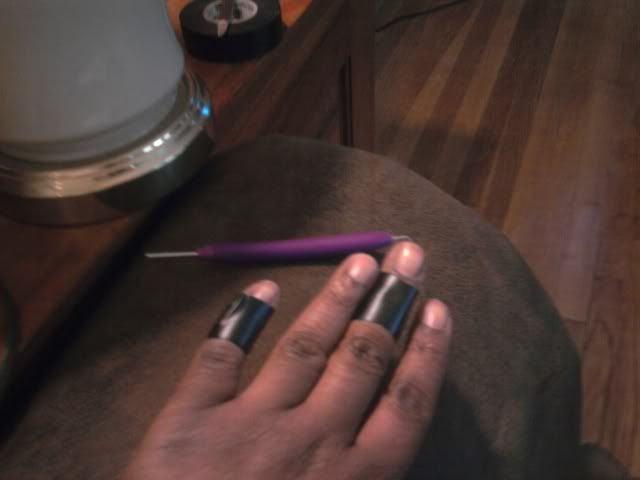
and my fingers! when i loom a lot, my fingers get irritated from rubbing up against the loom for hours. i tend to keep my pinkie finger tucked up under my hand so it's constantly rubbing against the loom as i knit. and the loom pick tends to rest on my middle a lot and that gets irritating after a while. so, whats my solution? electrical tape!!! i've found that electrical tape works the best out of all the tapes. its soft and flexible and it moves with you. i tried duct tape, masking tape, scotch tape. none of them worked. so now, when i know i'm going to put in a few hours of looming, i bust out with the roll of electrical tape. its actually in the little storage cubbies with the rest of my looming supplies!
here are a few pics of how i wrap up my fingers. you can actually see the little roll of electrical tape in the backround!! LOL! as different fingers get sore, i just cut a piece and wrap them up.


May 11, 2009
My First Blog Award!!!
well, i was awarded my first blog award!

The Kreativ Blogger Award!!!!
this was awarded to me by Helen, aka "myheartexposed" owner and moderator of the Knifty Knitter Loom Knitting Group on Yahoo. it's a great group and i suggest any loom knitter check it out!
helen said: "I am giving this award to Lilly because I admire the way she is not afraid to share her mistakes, ask for help then celebrate with everyone when she fixes them. Her loom knitting and loom knitting videos are very inspiring, her hair blog is just ace so well written and funny at times too. Caring for an afro is not an easy job to do but Lilly manages to come up with lots of creative ways to do just that, for this reason I feel her hair blog deserved a special mention and the award too."
thank you soooo much helen! this means a lot to me!
The rules of the "KreativBlogger Award" are to list seven things I love and then pass it on to another seven KreativBloggers. so here's my list!!
1. UNICORNS!!!! i'm ga-ga over them! i have two tattoos of unicorns on my forearms and countless figurines, statues, posters, and various wall mounts of them! i bought this $300 Waterford Crystal figurine of a unicorn. too beautiful
2. reading, mostly sci-fi fantasy and romance
3. sleeping. i can knock out 12 hours easy!
4. my locs
5.my sister Tasha, who also my very best friend. and my boyfriend Sean
6. my car, a 2007 toyota yaris liftback in bright red! i always wanted a red car, and i finally got it two years ago, brand new, off the lot with 6 miles on it!!
7. brown and gray. its my favorite colors for clothing, as boring as that sounds!
so, on to my nominations!
1. i'm gonna cheat a bit and nominate my sister. she doesn't have a written blog, but a youtube channel, Goldpurse. she has an afro the size of the sun and she shares tips and trick she uses with her natural hair. and she encourages all the sistas to embrace their natural nappy hair!
2. my friend emily and her Great Expectations blog. emily's blog just underwent a new CUSTOM look! she got me all jealous! and she's been blogging faithfully since she was preagnant with her first child, which i find VERY commendable, since i go for months between posts sometimes!
3. Robin at Rockin' The Loom. Robin is a member of many of the loom groups i frequent and she's also the teacher of the loom knitting newbies classroom. Robin is one of the only people who gave me the courage to attempt cables on a loom thanks to her 26 page tutorial!!! and thats a pretty BIG feat!! LOL!
4.isela phelps aka Purling Sprite. the mother of loom knitting tuturials. we would be lost without you!!!
5.miss kumina and her hair blog. i love her spirit and the fun way she writes! and she's recently ventured out into the youtube world, too!
6.ms. ofoprince and her loc blog over at pizco. she also has a blogger blog, too. she is a wealth of information!!!!
7. and finally, another cheat, to Supreme Dejhan, another youtuber. this woman had shared her journey of the road from meat eater, to vegatarian, to vegan. her vlogs are so personable and i really feel like i'm watching a close friend or family member when i follow her posts.
April 22, 2009
No Scratch Mitts
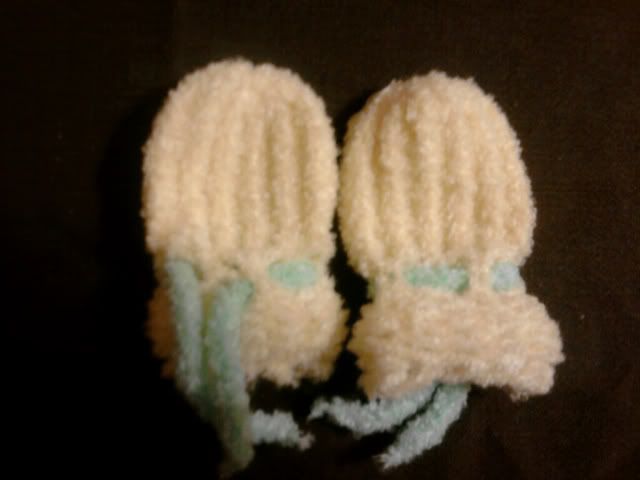
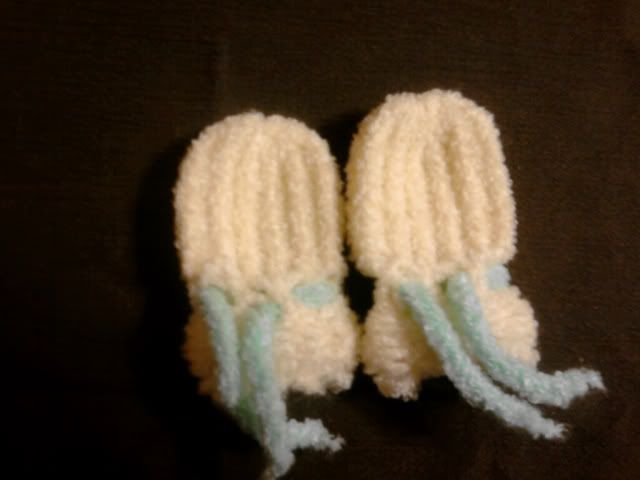
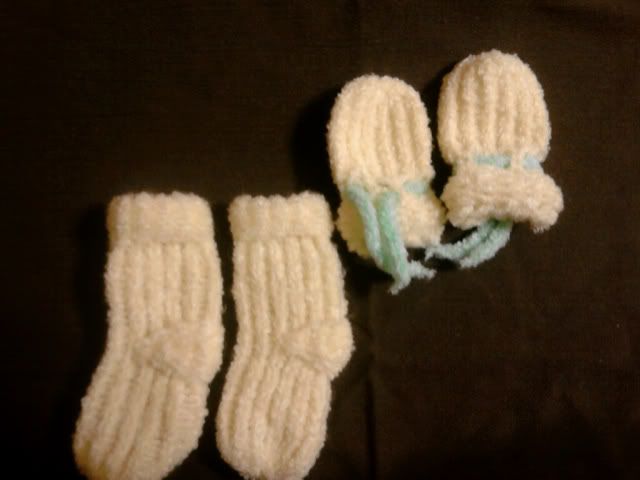
so i threw together some no scratch mitts to go with the inside out socks. it wasn't too bad. i only had to frog once when i decided i didn't like the brim. at first i e-wrapped the cuff, cause i wanted it to be fluffier than the body, but it was just too loose! i had gotten as far as the eyelets and the first couple of rows of the body. so i just ripped that out and did the cuff over using the purl stitch. it matches the booties better that way, too. i was going to do a i-cord in the same color as the mitt, but i thought it would blend too much, so i did it in the mint green color i had. i think it came out pretty swell! sorry about the quality of the pics, i had to use my phone again. i keep on forgetting to charge the battery on my camera!
here a pic of the front of one mitt and the back of the other so you can see how the i-cord is woven through
here a pic of both mitts from the front
and here are the mitts with the booties
here a pic of the front of one mitt and the back of the other so you can see how the i-cord is woven through

here a pic of both mitts from the front

and here are the mitts with the booties

Bib and bootie set
my friend, who i'm making the brown and green blanket for, well, her baby shower is this Sunday! there's not way i'm gonna have that blanket done in time! so i decided to put together a few small things instead. i really don't have the money right now to but her stuff, on account of being laid off and all!
i still had those yellow inside out booties from before. i'm gonna make a pair on no-scratch mitts to go with it. so i had some cantaloupe colored fleece yarn i got from a friend. i made another pair of booties from that. i decided to try my hand at making a bib, too. i couldn't find any loom patters, so i decided to wing it. but one of the things i discovered in my bib pattern search was that bibs need to be made our of cotton (to absorb moisture) or super washed wool (to repel moisture). i had some wool yarn, but it was the thick, super bulky kind. i doubt she would want a heavy wool bib for her summer baby. but, coincidentally, i had just bought some recycled cotton yard from a woman on Etsy and it just happened to be the same cantaloupe color as the fleece yarn!!!! talk about providence!
this was my first time working with cotton. it was a learning process, let me tell you! i used my fine gauge mini wonderloom. i tried the flat knit stitch. no way. it was way too tight. so then i tried to purl. that was a bit tight too, but it worked. but i ended up flipping the bib over and making the front the knit side. it has a garter stitch boarder. it looks kinda sloppy, but what are you gonna do? here are a few pics of it one the loom.
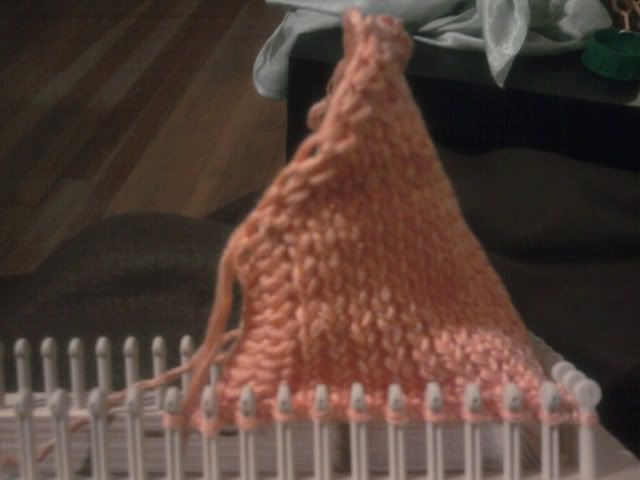
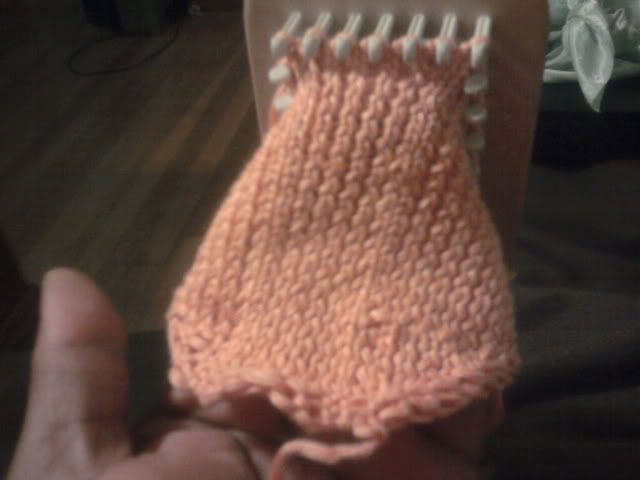
i sort of made the top up as i went along. of course i didn't take notes, so the sides aren't perfectly symmetrical, but i like it. one one side, i tried to make the ties sorta curve back inwards, but i just ended up making a mess of stitches. not something i think my friend will notice too much, but i see it! oh well. all in all, for my first try, i'm very satisfied.
i might try to squeeze in another hat or two to round it off. we'll see.
here are a couple of pics of the bib and bootie set. i tried different filters on my camera phone to capture the true color.
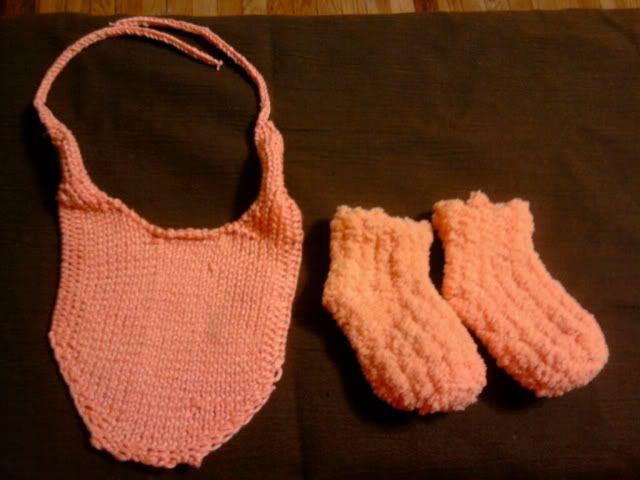
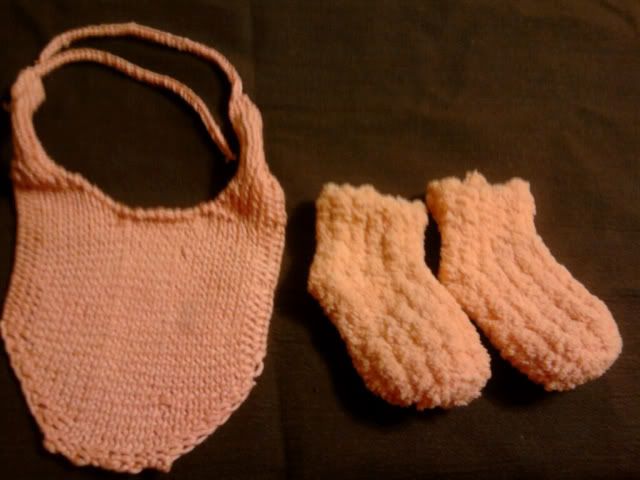
i still had those yellow inside out booties from before. i'm gonna make a pair on no-scratch mitts to go with it. so i had some cantaloupe colored fleece yarn i got from a friend. i made another pair of booties from that. i decided to try my hand at making a bib, too. i couldn't find any loom patters, so i decided to wing it. but one of the things i discovered in my bib pattern search was that bibs need to be made our of cotton (to absorb moisture) or super washed wool (to repel moisture). i had some wool yarn, but it was the thick, super bulky kind. i doubt she would want a heavy wool bib for her summer baby. but, coincidentally, i had just bought some recycled cotton yard from a woman on Etsy and it just happened to be the same cantaloupe color as the fleece yarn!!!! talk about providence!
this was my first time working with cotton. it was a learning process, let me tell you! i used my fine gauge mini wonderloom. i tried the flat knit stitch. no way. it was way too tight. so then i tried to purl. that was a bit tight too, but it worked. but i ended up flipping the bib over and making the front the knit side. it has a garter stitch boarder. it looks kinda sloppy, but what are you gonna do? here are a few pics of it one the loom.


i sort of made the top up as i went along. of course i didn't take notes, so the sides aren't perfectly symmetrical, but i like it. one one side, i tried to make the ties sorta curve back inwards, but i just ended up making a mess of stitches. not something i think my friend will notice too much, but i see it! oh well. all in all, for my first try, i'm very satisfied.
i might try to squeeze in another hat or two to round it off. we'll see.
here are a couple of pics of the bib and bootie set. i tried different filters on my camera phone to capture the true color.


April 21, 2009
Blanket Progress
i've been working off and on on the brown and green blanket for my friend. i was working on the brown panel and eye balling the length compared to the green panel. it kept on coming up short. finally, i was just tired of doing the same stitch over and over for days and i decided to start the seaming while the brown panel was still on the loom. turns out, the brown panel was waaaaaaaay longer than the green, like over 40 rows longer!! so i sat for an hour or so and tinked the stitches, but i was getting nowhere. so i decided to just grab a section a couple of inches down and force those stitches back on the loom. i knew i wasn't going to get the right loop back on, but i figured it was worth a try. it was incredibly hard! for starters, the panel is flat knit stitched. so trying to stretch that panel back out to fit on the loops was a B&*$H!!!! pardon my french. and then, as i started to unravel the stitches, i realized that i put the other stitches back on totally lopsided! so i ended up having to unravel a few, and then tink 20, next row unravel a few, tink 19. it took FOREVER!!!! in the end there's a weird looking row and you can clearly see a mistake, but i really don't care anymore! i did it! i actually ended up unraveling too much and i had to knit another 13 rows or so.
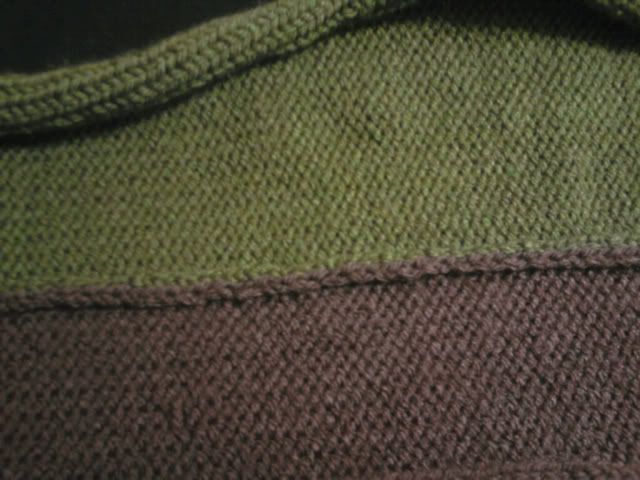
the seaming was a bit problematic, but not too bad. first i tried the i-cord seam from the GettinItPegged site, but that was totally not working! it looked nothing like Bethany's work. then i tried to crochet them together. i know almost nothing about crocheting other than how to do a chain, but i figured it would be like doing a chain through two stitches. that was a no go. so i just decided to mattress seam them together. but i think i missed the first stitch cause i didn't do a slipped stitch edge, but its okay. the seam looks very neat, so i'm happy with it.
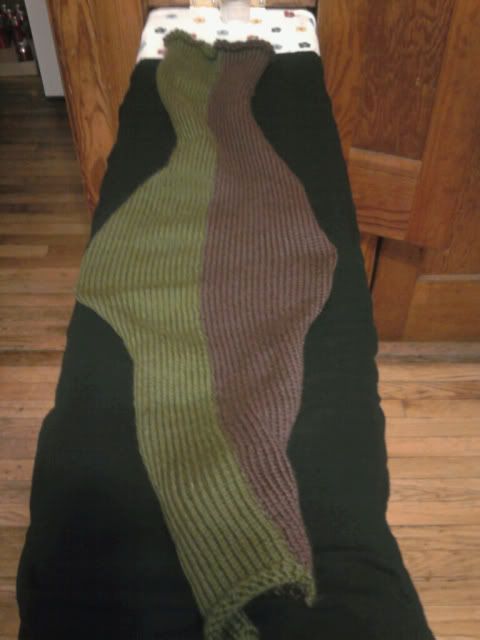
here are some pics of the blanket so far. here's the width. the sides curl cause its all knit stitched. i'm gonna make the outside panels have a garter stitch boarder.
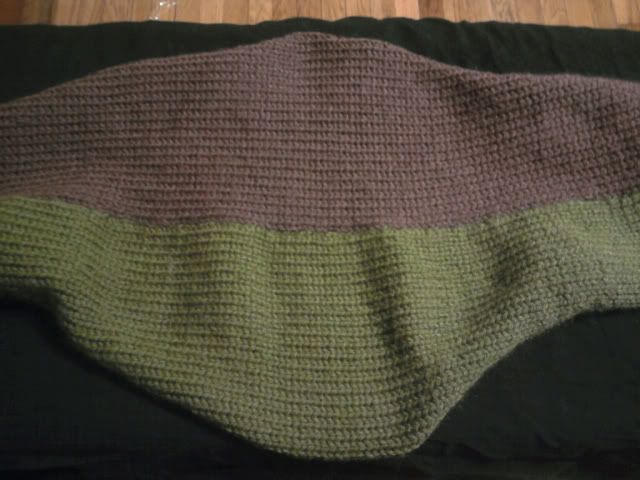
here's the length
and here's a pic of the seaming
like i said, i'm doing the outer panels in a garter stitch. i'm also doing them on the green loom instead of the blue one. the stitches are a little wider, but thats okay.
the seaming was a bit problematic, but not too bad. first i tried the i-cord seam from the GettinItPegged site, but that was totally not working! it looked nothing like Bethany's work. then i tried to crochet them together. i know almost nothing about crocheting other than how to do a chain, but i figured it would be like doing a chain through two stitches. that was a no go. so i just decided to mattress seam them together. but i think i missed the first stitch cause i didn't do a slipped stitch edge, but its okay. the seam looks very neat, so i'm happy with it.
here are some pics of the blanket so far. here's the width. the sides curl cause its all knit stitched. i'm gonna make the outside panels have a garter stitch boarder.

here's the length

and here's a pic of the seaming

like i said, i'm doing the outer panels in a garter stitch. i'm also doing them on the green loom instead of the blue one. the stitches are a little wider, but thats okay.
March 22, 2009
A Good Thing? Not Really.
So, I am officially a victim of the economy. I lost my job. I work for a non-profit and they're closing my program and three others. So I have approx 60 days until we close. The only good thing (but not really) is that I'll have tons more time for my looming! I have more than enough yarn to get me through this! I can finally do all those little projects that I put on hold. My plan is to relax and take the whole summer off. And maybe I'll sell some of my stuff on Etsy or Ebay or something like that. My focus would probably be on things for loc wearers, like hats, tams, and more loc jewelry pieces and matching earrings. I'm probably going to take the plunge and buy some more expensive yarns like silk and silk blends, since that's better for your hair. I'll make other things, too. Maybe some skinny scarves or things like that. I also have this pattern for toddler leggins that I've been wanting to do, as well. As long as I get my unemployment checks on time (cause I heard there's a two month hold-up in Massachusetts!) I should have a pleasant summer. I'm not expecting too much on the Etsy front, though. I've heard its hard for many people to make money on it cause it really depends on your marketing skills and how well you market yourself. And I have virtually no skills in that department. I mean, I have my Youtube subscribers. And the 5 or so people who follow my hair blog. That's not much! LOL! I mean, I'm not trying to make my living off of this (although in my heart of hearts, that would be my dream!!!!), just trying to fill the gap from my normal pay to what I'm going to be receiving from unemployment. I don't know. My carpel tunnel could flare up and I might not get anything done. We'll see.
February 22, 2009
My Loom Has Seen Better Days
look at my loom! its all scratched up and falling apart!
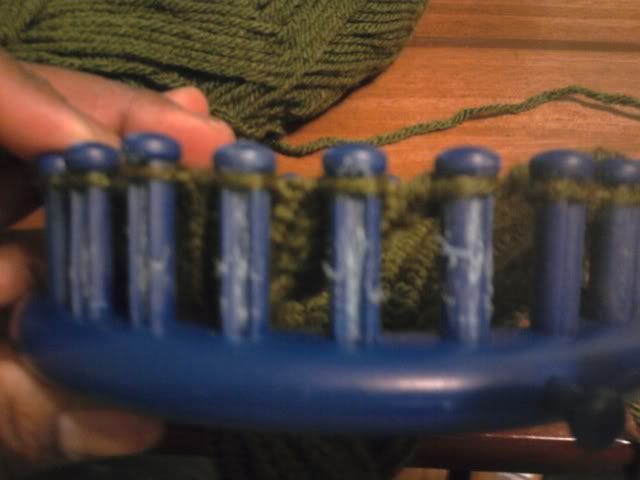
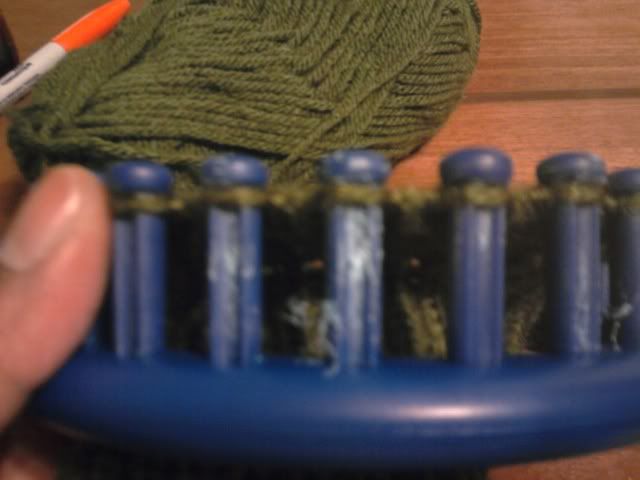
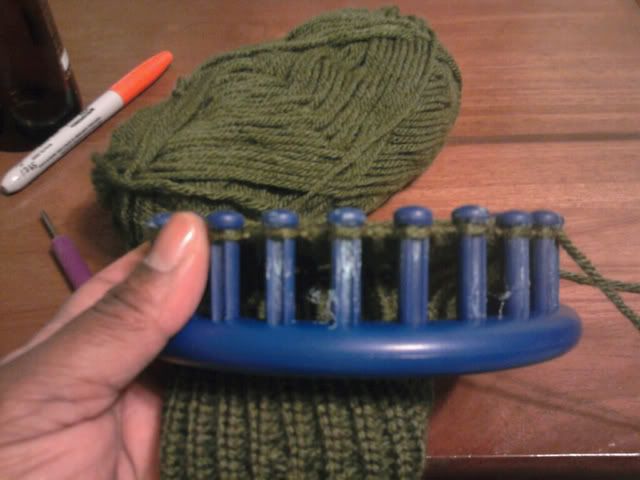
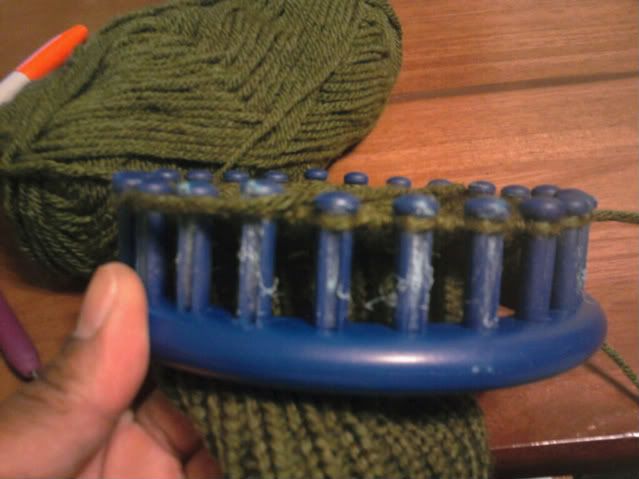
and while i'm knitting, i have to occasionally push some pegs more firmly in. they seem to be a bit wiggly and coming a bit loose. they haven't completely fallen out yet. when that happens, i'm gonna bring out the good 'ole super glue and put them back it. the green round kk loom has already lost the anchor peg. i just found it under the couch a few days ago. i glued that back in. the yellow round loom is all scratched up too. i think i heard somewhere that you're suppose to laquer or put clear nail polish on the pegs when you first get the looms to make it last longer. i think its time for a new set...


and while i'm knitting, i have to occasionally push some pegs more firmly in. they seem to be a bit wiggly and coming a bit loose. they haven't completely fallen out yet. when that happens, i'm gonna bring out the good 'ole super glue and put them back it. the green round kk loom has already lost the anchor peg. i just found it under the couch a few days ago. i glued that back in. the yellow round loom is all scratched up too. i think i heard somewhere that you're suppose to laquer or put clear nail polish on the pegs when you first get the looms to make it last longer. i think its time for a new set...
The Newest Baby Blanket
yup, i went and lost my mind and decided to start another baby blanket. this one i'm doing on the small round blue kk loom. i'm using Vanna's Choice yarn in brown and green. i bought 4 skeins of each color, so i better not run out! this time, i'm doing five or six long panels which i'm gonna seam together. don't ask me how. i was thinking about trying to crochet them. or maybe a mattress seam, although i'm not good at either of them. i could also do an i-cord and seam the panels to that. i'm sorta thinking of doing something big and chunky in black yarn so if it comes out too bad, it won't look that obvious.
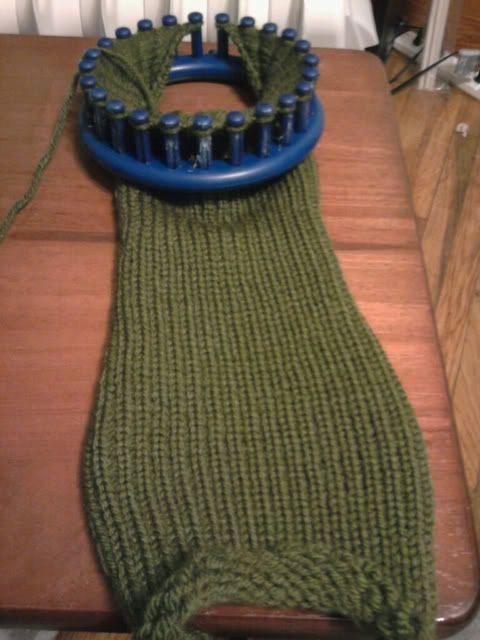
don't mind the color in this pic. i don't know why it looks so washed out.
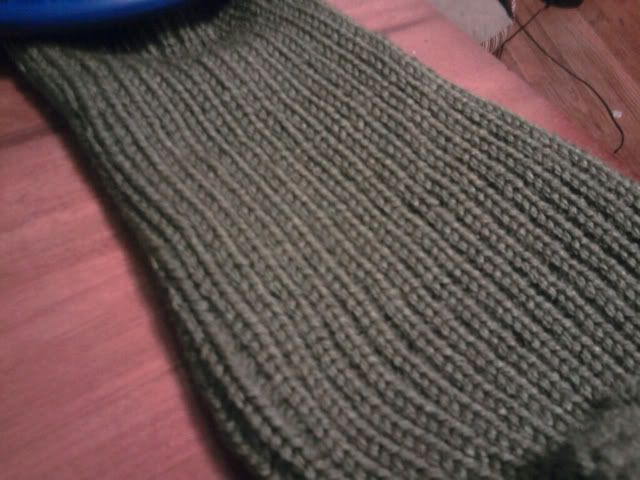
i'm just doing a flat knit stitch. its the easiest and fastest thing. but i'm playing around with the idea of doing something different for the two middle panels. we'll see how long it takes me to get these other panels done first and then i'll decide. i took this pic a few days ago. i'm done with this panel now. i'm just stuck on the bind off.
so far i've run across one major problem besides the question of how i'm going to seam it together. how am i gonna get the cast on and cast offs to look the same?! i did a cable cast on. looks like this:
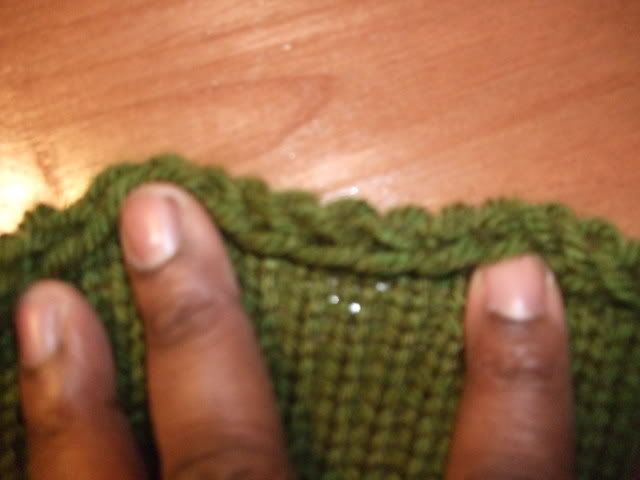
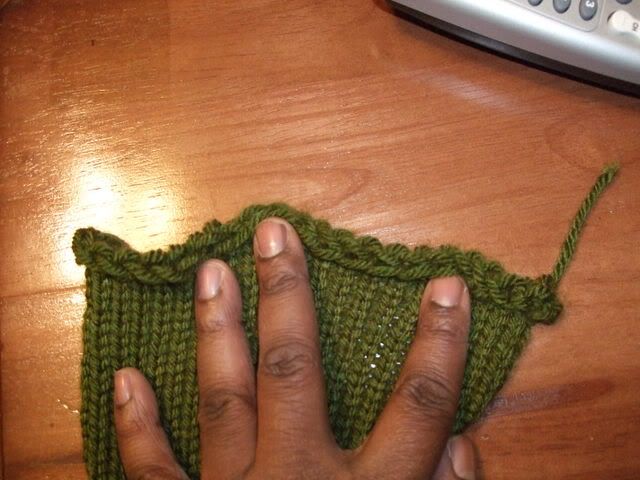
it kinda reminds me of the chunky braid stitch. from all my research, there isn't a cable cast off. so now i'm stuck with two options. either i can do a different bind off on the bottom and just have two looks. or i can do a flat panel bind off and have a curly top and a straight bottom. it will give the blanket an obvious top and bottom, which would be kinda cool. i may just do that. i'm just waiting to hear back from the people on the loom list on yahoo. a lot of them are much more experienced loomers than me and i'm sure they'll have better ideas.

don't mind the color in this pic. i don't know why it looks so washed out.

i'm just doing a flat knit stitch. its the easiest and fastest thing. but i'm playing around with the idea of doing something different for the two middle panels. we'll see how long it takes me to get these other panels done first and then i'll decide. i took this pic a few days ago. i'm done with this panel now. i'm just stuck on the bind off.
so far i've run across one major problem besides the question of how i'm going to seam it together. how am i gonna get the cast on and cast offs to look the same?! i did a cable cast on. looks like this:


it kinda reminds me of the chunky braid stitch. from all my research, there isn't a cable cast off. so now i'm stuck with two options. either i can do a different bind off on the bottom and just have two looks. or i can do a flat panel bind off and have a curly top and a straight bottom. it will give the blanket an obvious top and bottom, which would be kinda cool. i may just do that. i'm just waiting to hear back from the people on the loom list on yahoo. a lot of them are much more experienced loomers than me and i'm sure they'll have better ideas.
UFO's and New Looms
okay. i still haven't finished that baby blanket. i did more work on it, but then i stopped and went on to something else. and i never finished that sock. again, i did more work on it, but then i got distracted. it looks like i'm not gonna be much good at long term projects! in the mean time, i started two more projects. i'm doing a skinny scarf for my sister with that bernat shimmer yarn in brown. well, i sorta put it down to start on another project. i'm actually doing it on the efg wonder sock loom on the other end from where the sock is, so i've got two UFOs on that loom! and i'm working on another baby blanket! yeah, that's right, ANOTHER baby blanket! but this time i'm doing panels, but i'll do another post about that with pics. but anyways, i really really want to finish up that other first blanket, but i don't like it anymore! its really thick and heavy cause its double stitched on the long loom. its tedious to do a row and awkward because of the shape of the loom. now that i know more about looming, i'll never do a blanket that way again. but now i'm stuck with this unfinished thing on my loom that's been warped out of shape cause its been on there so long! i don't want to finish it! but i have too, because i won't be able to do two blankets in the time i have left! so my plan is to put my all into finishing up this newest blanket first. my friend is due may 14th (two days after my birthday!) then finish up that other blanket for my other friend who's due in july. i may just make the side panels in a single stitch and just have a bulkier middle. here's a link to the post about that other blanket, in case you forgot. as for that sock...i really don't know. i've had too many bad turns with that Kitchener stitch! yeah, i had another incident that i just couldn't write about. lets just say i got so angry i almost broke my blue round loom. i know, i know. very childish. in hindsight, i am very ashamed of myself. but i really don't want to go near that stitch again for a while.
i actually just bought two looms second-hand off a fellow member of the dalooms list on yahoo. one is a fine gauge mini wonderloom. i'll probably try another sock on that. it may be a bit easier and faster cause its a slightly larger gauge. i also bought a ten inch authentic knitting board off of her. she was selling them at really great prices! only $30 for the mini wonderloom and $15 for the knitting board!!!! isn't that great!!!! now i'll have more looms to put my UFOs on! LOL!
i actually just bought two looms second-hand off a fellow member of the dalooms list on yahoo. one is a fine gauge mini wonderloom. i'll probably try another sock on that. it may be a bit easier and faster cause its a slightly larger gauge. i also bought a ten inch authentic knitting board off of her. she was selling them at really great prices! only $30 for the mini wonderloom and $15 for the knitting board!!!! isn't that great!!!! now i'll have more looms to put my UFOs on! LOL!
January 25, 2009
UPDATE: The Never-Ending Sock
I DID IT!!!!!!!!! that's right, i finally did that heel! and you know what? apparently i'm a big baby, 'cause it was nothin'! actually, i think it was easier than on some of the bigger looms. so now i'm all set to finish this sock. my next hurdle will be doing the grafting for the toe, and we all know how my last kitchener stitch experience went... i just hope fear of ruining this sock won't make me put it down for 2 months again! i'll post pics of the heel as soon as it gets some more length and clears the bottom of the loom. YAY!!! so excited!!
January 13, 2009
Mitten and Hooded Scarf
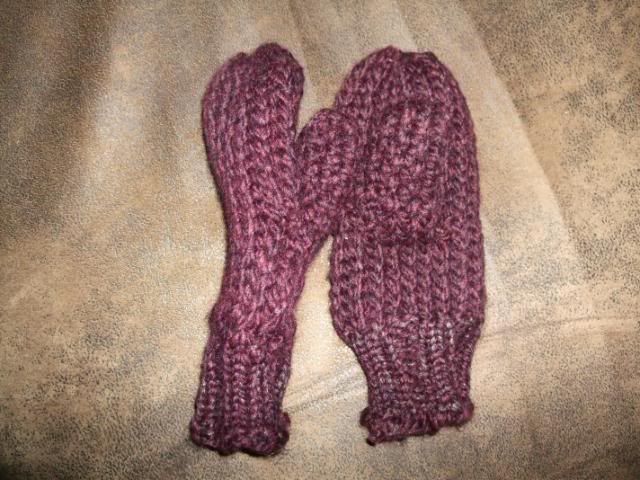
YAY!!! made a hooded scarf and mitten set for my friend!!!! it came out soooo cute. of course, there were a few mishaps. i decreased wrong on one side. one side of the scraf is longer than the other. But all in all, i'm psyched!!! so, here are the details, but keep in mind i rarely count stitches. i just work it til it looks even. i'm sorry and i know it makes it difficult to gauge how much yarn you'll need. i plan to go back and do it again and get the proper numbers later:
Mittens:
yarn- Lion's Brand Wool Ease Think & Quick in claret, small amount of Bernat Shimmer in brown for the cuff
loom- ITA mitten loom
stitches- rib stitch K2 P2, 2 over 1 e-wrap, 1 over 1 e-wrap.
this is basically the one loomed mitten design found here. i just did a ribbed cuff instead of the brim. and i adjusted the numbers slightly because the yarn was so thick. i used one skein of Thick & Quick to make both mittens. i used the rib stitch, K2 P2, to make the cuff. but the loom is 18 pegs, so at one point, you're gonna have to K4. the cuff is worked holding one strand of the claret and one strand of the shimmer in brown. i think i did this for about 12 rows. (i actually had notes written up so i could make the mittens symmetrical, but i lost them!! ARG!) then i dropped the Shimmer yarn and just used the claret and began doing a 2 over 1 stitch. this was a little hard on the fingers, but i wanted the mitten to be really thick and warm. you do about 7 rows, and then begin the flat panel for the thumb.
knit pegs 1-5,then turn back and knit pegs 6-2 for 25 rows.
you slipped the first stitch as you went back and forth to make a nice almost braided looking edge which is easier to seam up afterwards. i did the thumb with a regular 1 over 1 e-wrap.
began to knit in the round, going back to 2 over 1, until the mitten is the appropriate length. i can't for the life of me remember how many rows that was. i just stuck my hand in the mitten to gauge the size. then i did a little decrease to make the top not so bulky.
i moved stitches 1, 5, 10, and 15 to the pegs to the right of them and knit off.
then i did a gathered bind off. seam up the thumb and the mittens all done!
The Scarf:
well, the scarf was knit off the top of my head, making it up as i went along. just a warning, i'm not a pattern writer. these directions are crappy, but i'll go back later and spruce them up. here's the details:
yarn- 1 skein Lion Brand Wool Ease Thick & Quick in claret, 1 skein of the same in black.
loom- yellow knifty knitter long loom (38 pegs)
stitches- figure 8 stitch, flat panel e-wrap
i began by casting on the fist 15 pairs of pegs using the figure 8 stitch. i used stitch markers to mark all 30 stitches of the first row. i did not use the end pegs at all. after about 5 inches or so, i realized the hood wasn't going to be deep enough if i didn't make it wider, so i began to increase, one pair at a time.
so, as i wrapped my way back up the pegs, when i got to the 15th pair, i also wrapped the 16th pair twice, still using the figure 8 stitch, so i got two rows of stitches on the pegs. now i'm using 16 pairs of pegs. i knit for 4 rows, then i increases another pair. knit another 4 rows. i continued this till all the pegs (except the end pegs) were wrapped. i knit until i had about 10 inches of material the width of the entire loom.
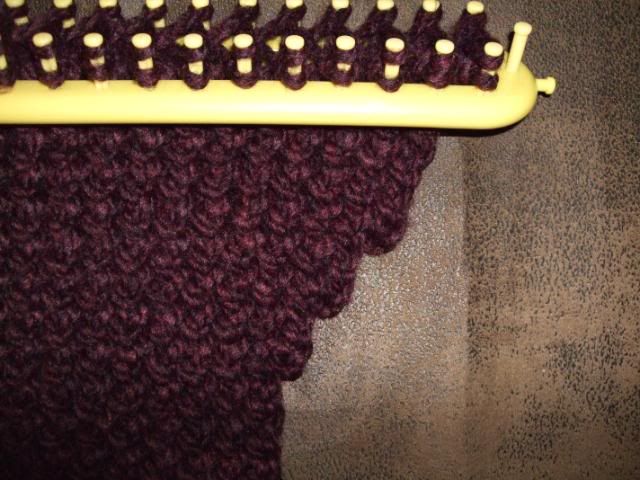
then i began the decrease. now, i did this wrong, but i'll tell you guys the correct way. so, you're at the 18th pair. you take the loop from the 17th pair, bring them over onto the 18th pegs and knit off. then move the loops from the 18th pegs and put them on the empty 17th pegs. knit four rows. decrease again and knit four rows. do this until you're back down to 15 pegs. knit until you have another 5 inches or so, or until its even, meaning if you folded the hood part in half to knit the seam, the increases and decreases line up and the sides are the same length. by this time, i only had about 18 inches of yarn left over. i left this as i planned to use it to seam up the hood later. now its time to introduce the black yarn. you should have 1 row wrapped on the loom. wrap a row of black over that and knit off.
i did 8 rows of black, then i began the decrease. decrease one pair of pegs. knit four rows. decrease another pair. knit four rows. do this until you are using 9 pairs of pegs. knit 4 more rows.
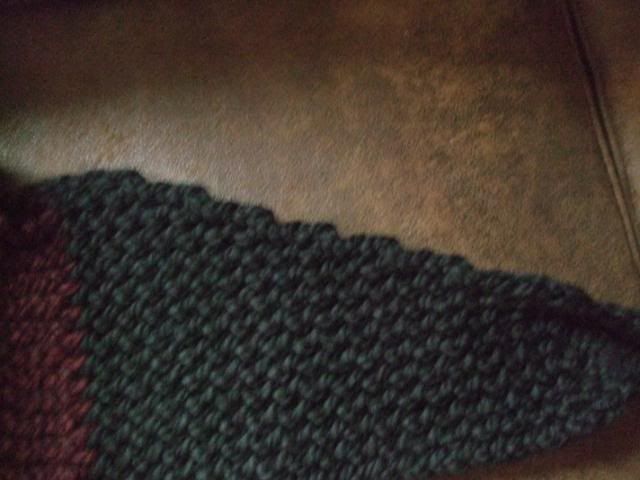
now its times to make the double panel a single panel.
alright, so you have nine pairs of pegs being used, numbered 1-9 from left to right on rows 1 and 2. you're going to criss-cross the pegs as you combine them to get a nice even spaced holey design.
so, you take the loop from peg 8 on row 1 and place it on peg nine on row 2. take the loop from peg 9 on row 1 and place it on peg 8 on row 2. knit off.
loop 6 row 1 goes onto peg 7 row 2, loop 7 row 1 goes on peg 6 row 2. knit off
loop 4 row 1 goes onto peg 5 row 2, loop 5 row 1 goes on peg 4 row 2. knit off
loop 2 row 1 goes onto peg 3 row 2, loop 3 row 1 goes onto peg 2 row 2. knit off
loop 1 row 1 goes onto loop 2 row 2. knit off
now you have nine pegs one 1 side of the loom and you can begin to knit a flat panel using the e-wrap. i knit till the piece was about 7 inches. this part curls up on itself and makes a nice tube like ending.
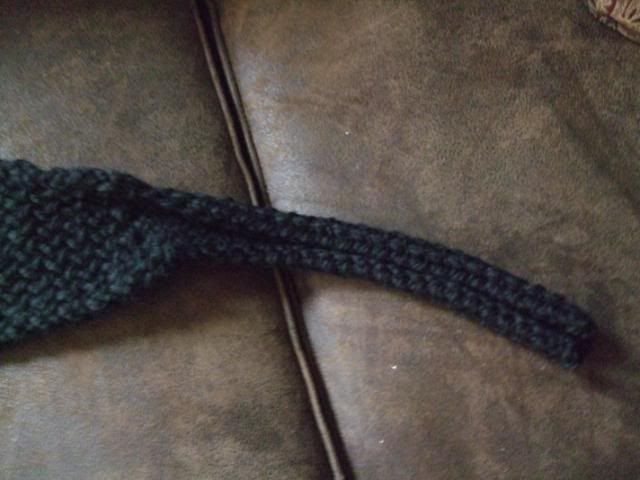
switch the piece around and put the other end of the hood back on the loom and repeat with the black yarn. Ta-Da!!
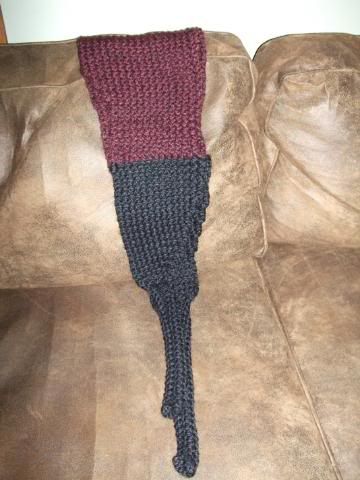
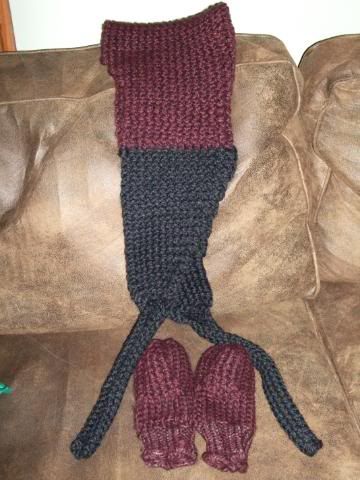
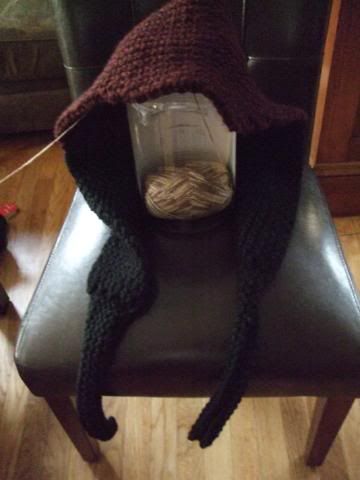
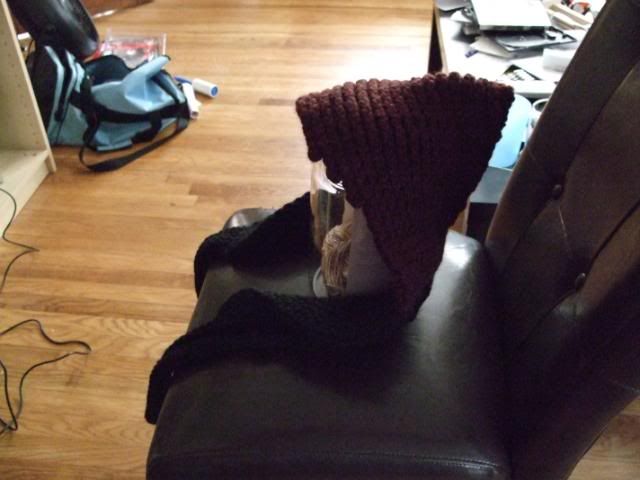
i know, i know, that was terrible directions! i promise, i will re-do this later, with accurate numbers, and maybe a video or two to illustrate my point, in about a month or so. i just really need to finish up on this never-ending blanket and sock and maybe make a baby cocoon. and then i'll re-do this properly. but i have to get this down or else i'll forget what i did.
Mittens:
yarn- Lion's Brand Wool Ease Think & Quick in claret, small amount of Bernat Shimmer in brown for the cuff
loom- ITA mitten loom
stitches- rib stitch K2 P2, 2 over 1 e-wrap, 1 over 1 e-wrap.
this is basically the one loomed mitten design found here. i just did a ribbed cuff instead of the brim. and i adjusted the numbers slightly because the yarn was so thick. i used one skein of Thick & Quick to make both mittens. i used the rib stitch, K2 P2, to make the cuff. but the loom is 18 pegs, so at one point, you're gonna have to K4. the cuff is worked holding one strand of the claret and one strand of the shimmer in brown. i think i did this for about 12 rows. (i actually had notes written up so i could make the mittens symmetrical, but i lost them!! ARG!) then i dropped the Shimmer yarn and just used the claret and began doing a 2 over 1 stitch. this was a little hard on the fingers, but i wanted the mitten to be really thick and warm. you do about 7 rows, and then begin the flat panel for the thumb.
knit pegs 1-5,then turn back and knit pegs 6-2 for 25 rows.
you slipped the first stitch as you went back and forth to make a nice almost braided looking edge which is easier to seam up afterwards. i did the thumb with a regular 1 over 1 e-wrap.
began to knit in the round, going back to 2 over 1, until the mitten is the appropriate length. i can't for the life of me remember how many rows that was. i just stuck my hand in the mitten to gauge the size. then i did a little decrease to make the top not so bulky.
i moved stitches 1, 5, 10, and 15 to the pegs to the right of them and knit off.
then i did a gathered bind off. seam up the thumb and the mittens all done!

The Scarf:
well, the scarf was knit off the top of my head, making it up as i went along. just a warning, i'm not a pattern writer. these directions are crappy, but i'll go back later and spruce them up. here's the details:
yarn- 1 skein Lion Brand Wool Ease Thick & Quick in claret, 1 skein of the same in black.
loom- yellow knifty knitter long loom (38 pegs)
stitches- figure 8 stitch, flat panel e-wrap
i began by casting on the fist 15 pairs of pegs using the figure 8 stitch. i used stitch markers to mark all 30 stitches of the first row. i did not use the end pegs at all. after about 5 inches or so, i realized the hood wasn't going to be deep enough if i didn't make it wider, so i began to increase, one pair at a time.
so, as i wrapped my way back up the pegs, when i got to the 15th pair, i also wrapped the 16th pair twice, still using the figure 8 stitch, so i got two rows of stitches on the pegs. now i'm using 16 pairs of pegs. i knit for 4 rows, then i increases another pair. knit another 4 rows. i continued this till all the pegs (except the end pegs) were wrapped. i knit until i had about 10 inches of material the width of the entire loom.

then i began the decrease. now, i did this wrong, but i'll tell you guys the correct way. so, you're at the 18th pair. you take the loop from the 17th pair, bring them over onto the 18th pegs and knit off. then move the loops from the 18th pegs and put them on the empty 17th pegs. knit four rows. decrease again and knit four rows. do this until you're back down to 15 pegs. knit until you have another 5 inches or so, or until its even, meaning if you folded the hood part in half to knit the seam, the increases and decreases line up and the sides are the same length. by this time, i only had about 18 inches of yarn left over. i left this as i planned to use it to seam up the hood later. now its time to introduce the black yarn. you should have 1 row wrapped on the loom. wrap a row of black over that and knit off.
i did 8 rows of black, then i began the decrease. decrease one pair of pegs. knit four rows. decrease another pair. knit four rows. do this until you are using 9 pairs of pegs. knit 4 more rows.

now its times to make the double panel a single panel.
alright, so you have nine pairs of pegs being used, numbered 1-9 from left to right on rows 1 and 2. you're going to criss-cross the pegs as you combine them to get a nice even spaced holey design.
so, you take the loop from peg 8 on row 1 and place it on peg nine on row 2. take the loop from peg 9 on row 1 and place it on peg 8 on row 2. knit off.
loop 6 row 1 goes onto peg 7 row 2, loop 7 row 1 goes on peg 6 row 2. knit off
loop 4 row 1 goes onto peg 5 row 2, loop 5 row 1 goes on peg 4 row 2. knit off
loop 2 row 1 goes onto peg 3 row 2, loop 3 row 1 goes onto peg 2 row 2. knit off
loop 1 row 1 goes onto loop 2 row 2. knit off
now you have nine pegs one 1 side of the loom and you can begin to knit a flat panel using the e-wrap. i knit till the piece was about 7 inches. this part curls up on itself and makes a nice tube like ending.

switch the piece around and put the other end of the hood back on the loom and repeat with the black yarn. Ta-Da!!


i know, i know, that was terrible directions! i promise, i will re-do this later, with accurate numbers, and maybe a video or two to illustrate my point, in about a month or so. i just really need to finish up on this never-ending blanket and sock and maybe make a baby cocoon. and then i'll re-do this properly. but i have to get this down or else i'll forget what i did.
Subscribe to:
Comments (Atom)


